SiriusXM Satellite Radio – Enhancing Your Tesla Experience
Disclaimer: These instructions work for me and have worked well for me for an extended period of time while having SiriusXM Satellite Radio installed in my Model 3. I am not responsible if you attempt this install and botch something, and end up causing damage to your car or your XM unit. Attempt this at your own risk. Please feel free to ask questions in the comments here or consult a car stereo installation expert in your area if you have any concerns or issues.
Accessing the FM Radio Unit
The following YouTube video can be helpful. It will be referenced several times (as video 1) during these subsequent install instructions:
The FM radio unit is in the passenger C-pillar. At around 9:19 in video 1, you can see how to pull the trim down to access it.
Adapters
Once you access the FM radio unit, you will need to install two Model 3 antenna adapters in order to get the SiriusXM Satellite Radio signal embedded into the FM signal inside the car. In areas of extreme FM band saturation, there can sometimes be static over the XM signal – injecting the XM signal directly into the FM frequency helps prevent that. This is a situation we have here in southern California.
First, you will need to disconnect both connectors to the radio unit (both black and white). Second, you will need to connect the existing cable with the white connector to the FAKRA female adapter.
The plug from that adapter then goes to the “from FM antenna” jack on the FM direct adapter (or aux input adapter). Then, the output from the FM direct adapter goes to the antenna female adapter.
The plug on that adapter should fit the FM radio unit where the white connection was originally connected. In order for this to work more effectively, you need to leave the black ribbon connector disconnected. I believe (based on forum discussions) that this is because this ribbon cable is powering the FM antenna amplifier. This allows stronger stations to overpower the XM signal.
Keeping the Ribbon Connector at Bay
In the following picture, you can see that I have taped the ribbon connector to the body of the car with some electrical tape. This is to keep it out of the way and prevent it from getting damaged just hanging there:
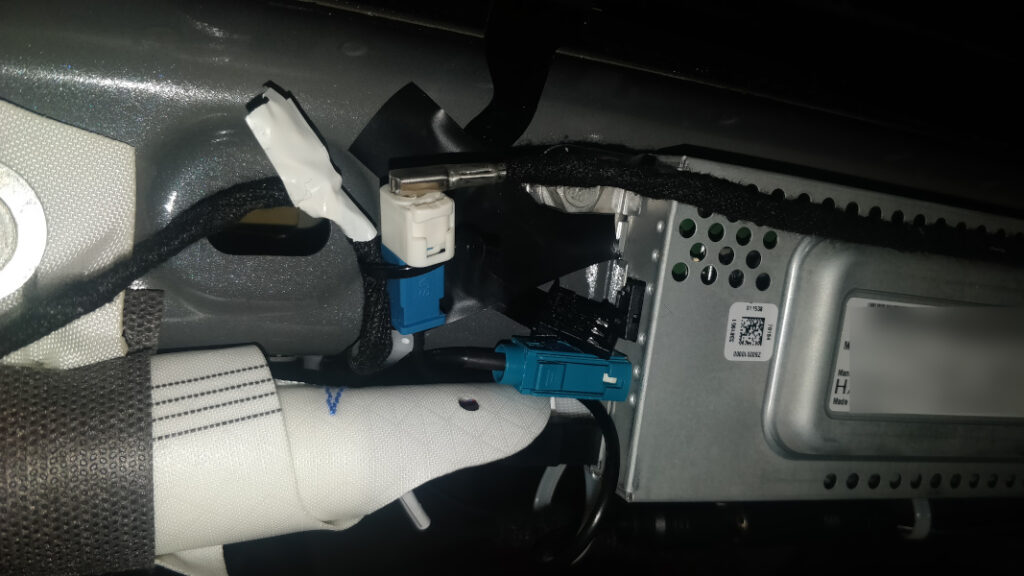
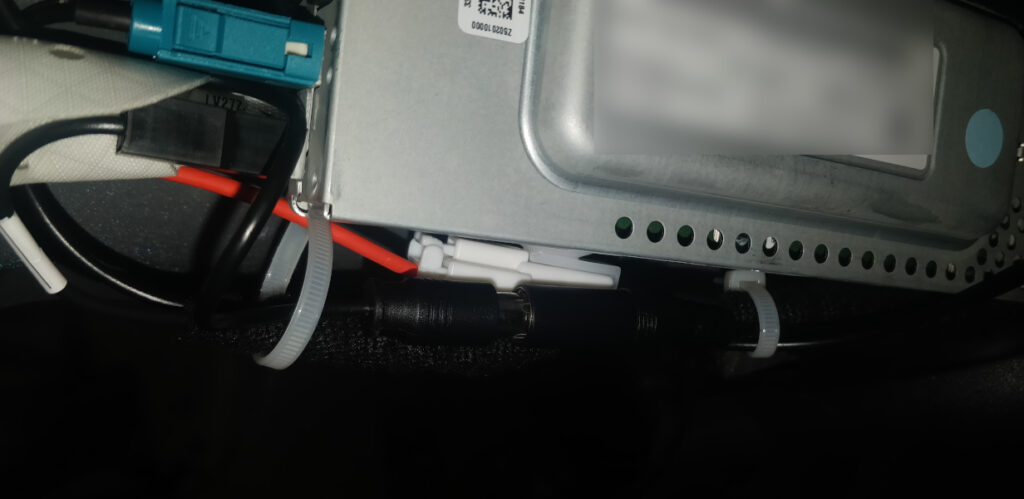
From there, I zip-tied the connected wires to the wire on the bottom of the FM radio as shown here:
Fitting Everything Into Place
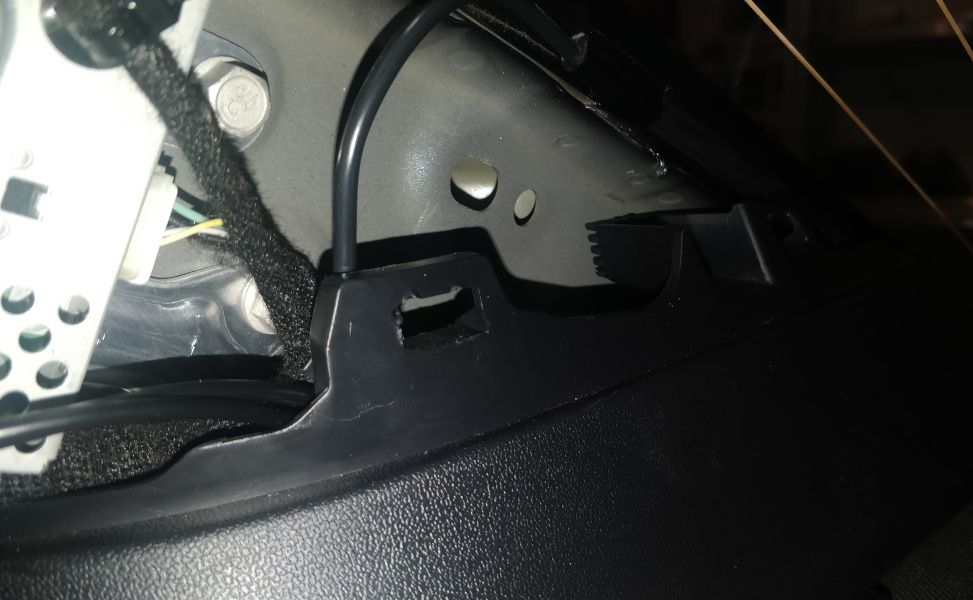
Back towards the rear windshield, there is a little cubby which you can tuck the body of the FM direct adapter into. You can sort of see it here, right up against the rear windshield and the body pillar:
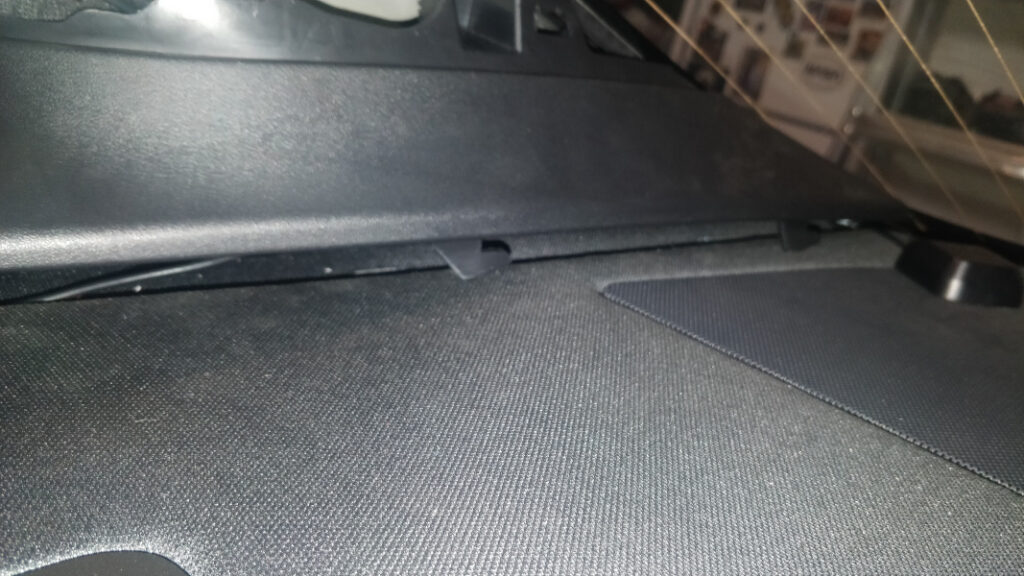
From there, you can lift the seatbelt trim piece up and out. This is so you can route the wire towards the front under it.
At around 10:10 in video 1, you can see how to pull that trim piece out. Once you have it out, you can just kind of lift it up towards the roof of the car and nudge the tabs outward onto the rear deck (so that you can slide the wire under it). Shown here:
Placing the SiriusXM Satellite Radio Antenna
You can also see my XM antenna in this picture. It is running out diagonally from the corner onto the rear deck (it’s metallic so the magnet will stick it in place wherever you want to put it up there). It works just fine right there. You don’t need to try to get it outside the car. This of course would be problematic because the roof is glass and the magnetic XM antenna won’t stick to it). It works just fine inside. The only thing I might try to do at some point is move it over to the center. I’m not sure that’s even worth the effort because it has been nearly perfect right where I have it.
There is the occasional dropout if I’m up against a hill in the direction of the satellites or under an overpass, but nothing crazy. The antenna wire follows the FM direct adapter wire to the front of the car from there (see below).
Routing the Wires
After that, the wire(s) can be routed down behind the side trim and under the rear seat. See what Jon did in video 1 around the 7:15 mark.
From there, the wire runs to the front of the car as he did in video 1, but in reverse. He started in the front of the car, we’re starting in the back. You can just tuck it under the side trim along the side of the car. One catch: you will probably need to get a 2.5mm extension cable, similar to this one. The cable from the FM direct adapter was only long enough to make it to just past the rear seat. I had to connect the extension cable to go the rest of the way.
Removing the Console
Once I got the cable behind the console, I pulled the console out using the instructions that are available here.
A few quick notes about pulling the console:
- You may have issues removing the back cover (under the rear USB ports) without putting on gloves to get a better grip. It just pops off once you have enough of a grip on it to kind of push inward from the sides.
- It was very difficult to get the front USB connection to release (at least, it was in my case). Your mileage may vary on these two points. I felt like I should note them in case it helps anyone else.
- Third is the screw/bolt sizes. The 6 bolts are 10mm, and the two recessed screws are T20. The recessed screws may or may not be present, depending on your build.
Once I had the console out, I drilled a hole using a 1/2″ bit in the lower right corner to feed the wires into the front cubby. This was slightly too small. My friend helped me enlarge it a bit by just drilling around a bit with the 1/2″ bit. We were able to keep the hole pretty round. However, if I had this to do over again I’d probably either go one size up with a 5/8″ bit. Or just use a hole saw and be done with it. I may eventually pull the console out again and file the hole down a bit with a small file. Just to make it more uniform.
I fed the wires through the newly drilled hole and added a grommet to finish it. Unfortunately, I did nick the interior felt a little bit, which annoys the hell out of me. Though it’s not horribly noticeable unless I shine la ight on it. The grommet covers most of it up. Plus, I was able to make the rest of it less noticeable by using a black marker.
Getting Power to the Unit
I followed the procedure in another of Jon’s videos for removing the side panel trim from the console.
The following video will be referenced as video 2 throughout the rest of this post:
At around 4:50 in video 2, you can see how to take off the side trim from the console as well as the chrome strip. Once those are off, you can remove the little rubber bumper from the main console storage area. This is located under the armrest. Then run the thin power wire for the onyx plus through the small notch there. The rubber bumper will fit back over the top of it. You can then route the cable under the chrome trim piece and around the back of the console. It will enter the front compartment via the same hole the antenna and FM direct cables came through.
Here are some pictures of the power attached in the center storage area. I just installed a splitter so that I am able to plug the Onyx in there and still have two additional ports available for whatever else:
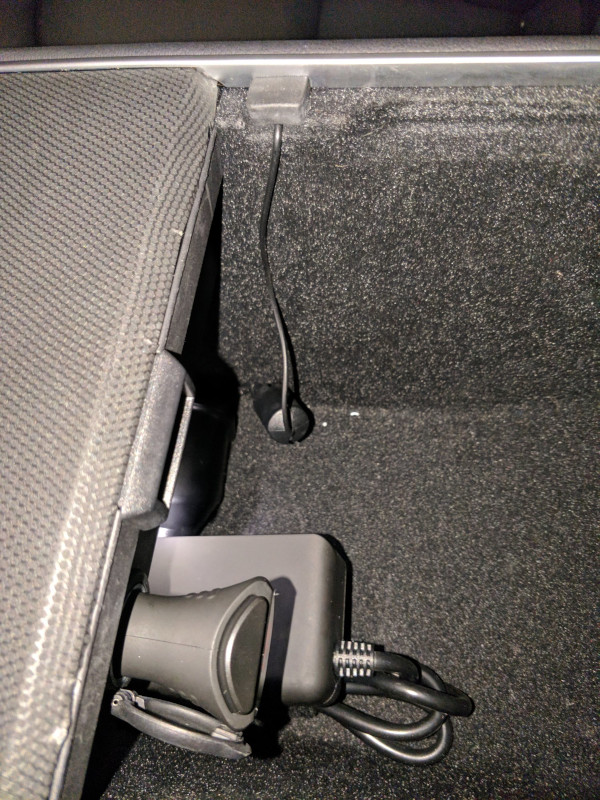
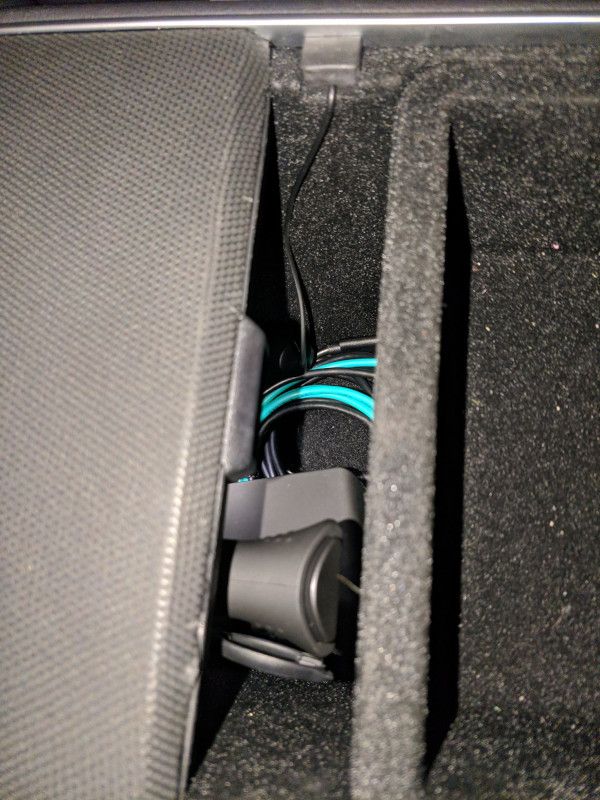
I used this mount for securing the Onyx unit itself inside the front of the console. The dashboard disc is stuck to the side wall of the front cubby, and the arm is mounted onto that. Read more about the Akron Windshield Suction Car Mount in our review of that product! Here is the final result:
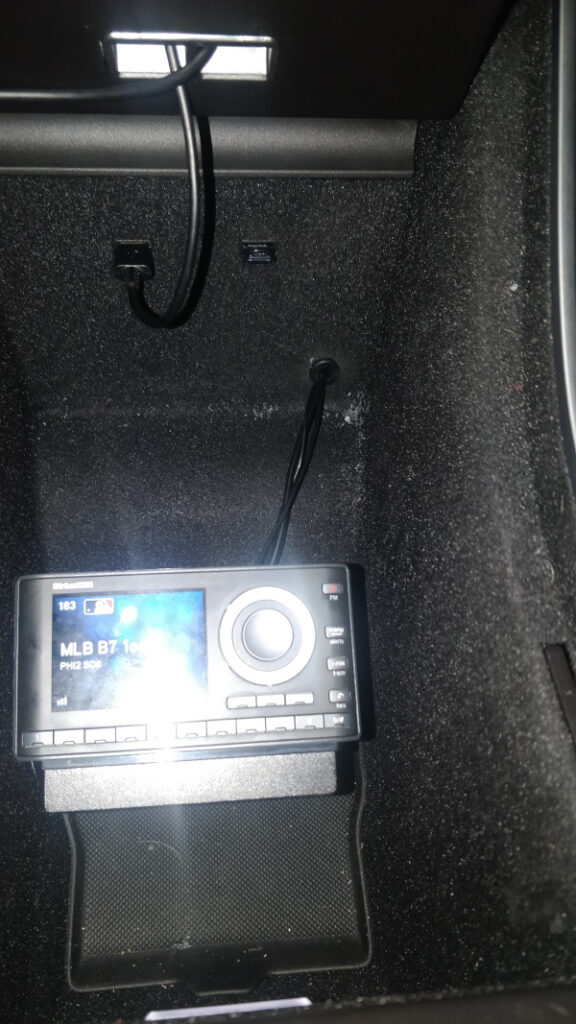
I can reach the buttons, but I prefer to use the remote.
Without the XM FM direct adapter installed, it was impossible to get the SiriusXM Satellite Radio signal into the FM band when within radio distance of any major city. Every station within range overpowered it. When installed this way, the satellite radio signal has been nearly flawless.
Watch Out for Strong FM HD Signals
Even with the antenna amplifier disconnected, strong HD stations can overpower the XM signal. You can resolve this issue by either turning HD off (by tapping the HD icon on the main screen), or just switching to another station. The only time I’ve ever seen this happen was in Long Beach, CA. I was using 88.3 as my preset, shortly after first install. There is a powerful station on 88.3 in Long Beach that required me to either turn off HD or go a little bit down the dial to 88.1. I tested both options, and both worked fine.
See more of our Home & Tech Project posts and Tech Product/Accessory reviews.
See all Reviews in our Product Review Portal.
Setting Up FM Output Options
I have five low or high stations (88.1, 88.3, 88.5, 107.7, 107.9) set as presets in the Model 3 radio. The Onyx Plus has those five stations saved as FM outputs. In my travels throughout southern California (both LA and San Diego), I’ve never had to change the FM setting to anything other than 107.7. It also works across the desert to Phoenix, AZ and Las Vegas, NV.
The main takeaway: 107.7 has been flawless across that entire wide swath of the southwestern US. The minor exception was when we stopped for lunch in Blythe, CA. Blythe has a station on 107.7. Even then, it was only strong enough to overpower the XM signal for a few seconds, and just passing by on the 10 didn’t allow the signal to drop out.
(NOTE: see 10/17/2020 update below for more information on potential FM channel issues)
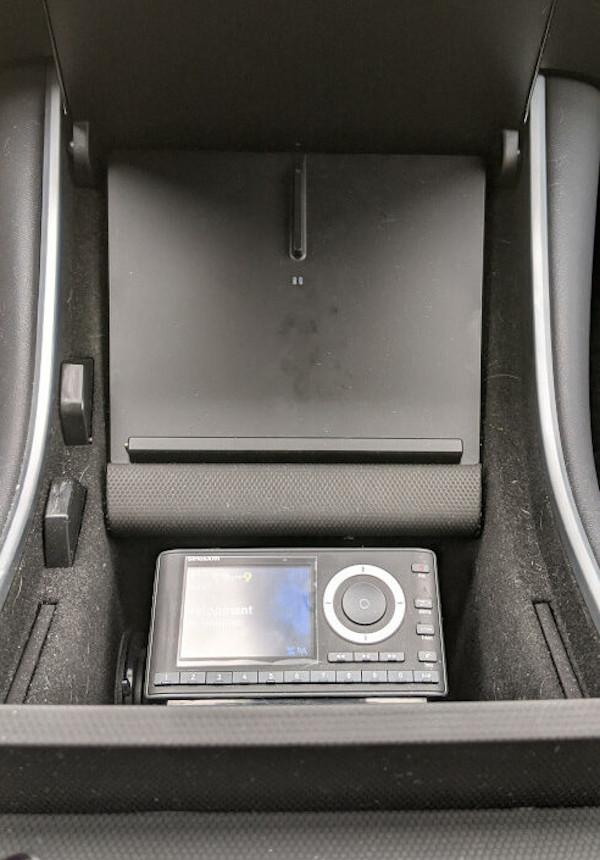
The best part of this install, in my eyes? Two things really stand out:
- It looks like it could have come from the factory like this. No wires are visible except the short strand of antenna wire where the XM antenna juts out onto the rear deck.
- You can easily close the lid of the console when leaving the car. This is so that nothing is visible on the inside – so you’re not giving potential thieves any reason to try to break into the car.
UPDATE (8/12/2020): Over the past month or so, I have made two small changes to this mod.
- I have completely disconnected the FM antenna from the FM tuner. What this means in practice is that only the FM Direct Adapter is connected to the tuner (via the antenna adapter). Both the ribbon cable (from the antenna amplifier) and the white connector (which I believe is antenna IN) are now disconnected.
- I have disconnected the FM antenna amplifier, which is located in the driver side C-pillar (opposite the FM tuner). I disconnected the white FAKRA connector, and did not attempt to disconnect the black ribbon connector (it was connected super tight and I didn’t want to break it).
Why:
I made these changes for a simple reason: as I mentioned earlier, there was one instance (in Blythe, CA) where even with my original mod, a strong FM station could theoretically still override the SiriusXM Satellite Radio signal. There was also an instance where a strong HD signal could override the XM signal. I wanted to eliminate any such possibility.
This does (obviously) severely degrade and actually almost eliminate FM reception, except for the absolute strongest, closest stations. In my case, with how little I use FM radio, this isn’t an issue for me. If I ever want to listen to a FM channel for some reason, I’ll just stream it from my phone. That’s an acceptable trade-off for me, given how little I actually use FM. Having a clear signal and optimal sound quality from my SiriusXM Satellite Radio unit is more important to me than increased FM reception.
There is a noticeable improvement in sound quality with the FM antenna completely disconnected, even in areas where I thought the sound was fine previously. If FM reception is not something you care about, I would strongly recommend going this route and disconnecting the FM antenna completely.
I’ll upload pictures of this new setup when I get a chance to take the trim off again and snap a few.
UPDATE (10/17/2020): After a recent cross-country road trip, I STRONGLY recommend completely disconnecting the FM antenna. There were several locations where even with the FM antenna disconnected that I had to switch stations, which leads me to believe that if it were still connected I could have run into issues.
As I mentioned before, YMMV on this as far as the trade off between FM and clear XM sound goes. The degradation of FM reception was an acceptable trade off for me, as I almost never use FM (in fact, I didn’t use it once on our 5,000 or so mile road trip that was just completed.

[…] I’ve also created a detailed explanation of the process I used for installing SiriusXM Satellite Radio in a Tesla Model 3. […]
[…] just gone through the installation process for adding SiriusXM Satellite Radio to our Tesla Model 3. But how to prop or hold the actual satellite unit in the car. At first I just let it sit on the […]
[…] if you don’t need the FM and only want SiriusXM, this is how it goes, whether or not you have the FM hardware — both ways […]
[…] few years ago, I wrote detailed instructions on how to install SiriusXM Satellite Radio in your Tesla Model 3. The downside was that this was […]
[…] Lexerd MP3 Screen Protector for its’ advertised anti-glare feature. It was being used on my Sirius XM unit that I recently installed in my car. While driving the glare from the sun was quite a distraction and I needed a safe, working […]